3D Printing: My Mandalorian Helmets
My Mandalorian Helmets
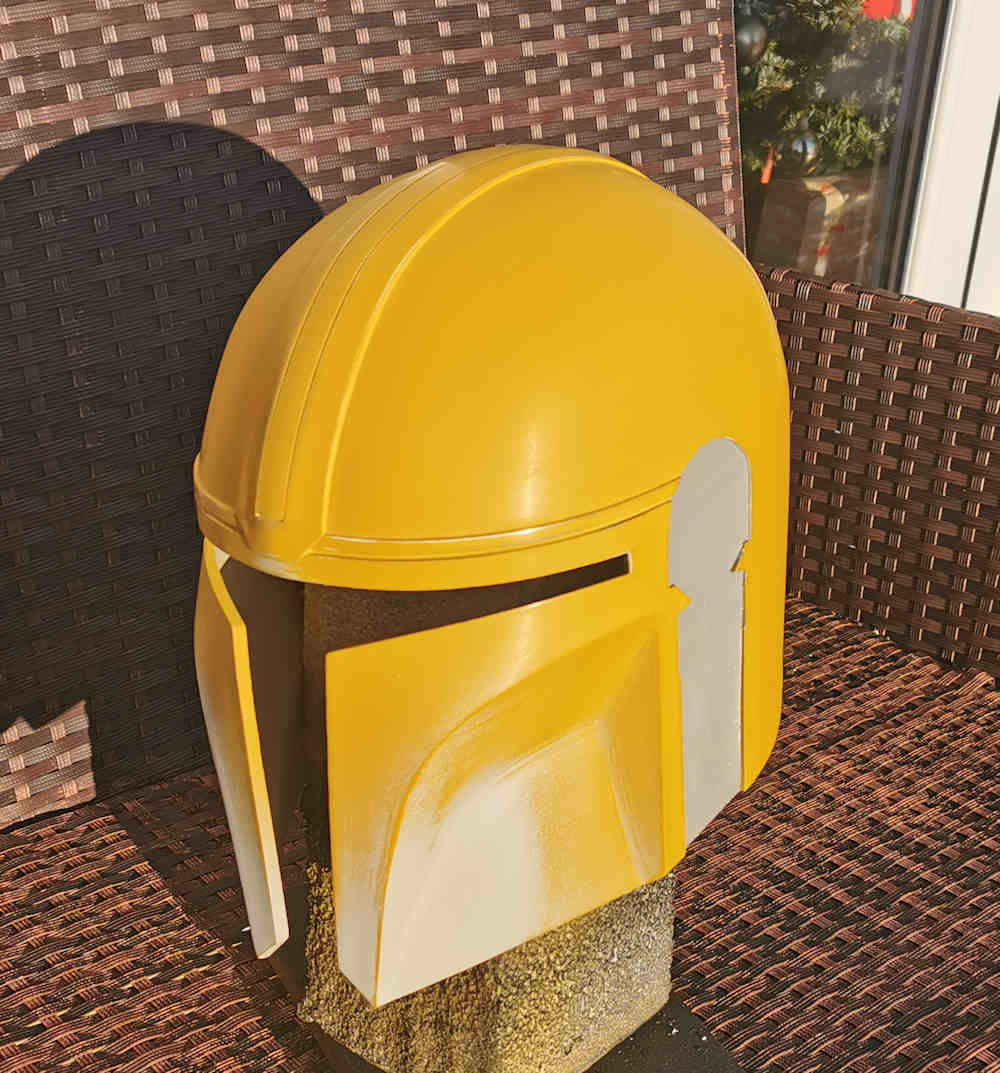
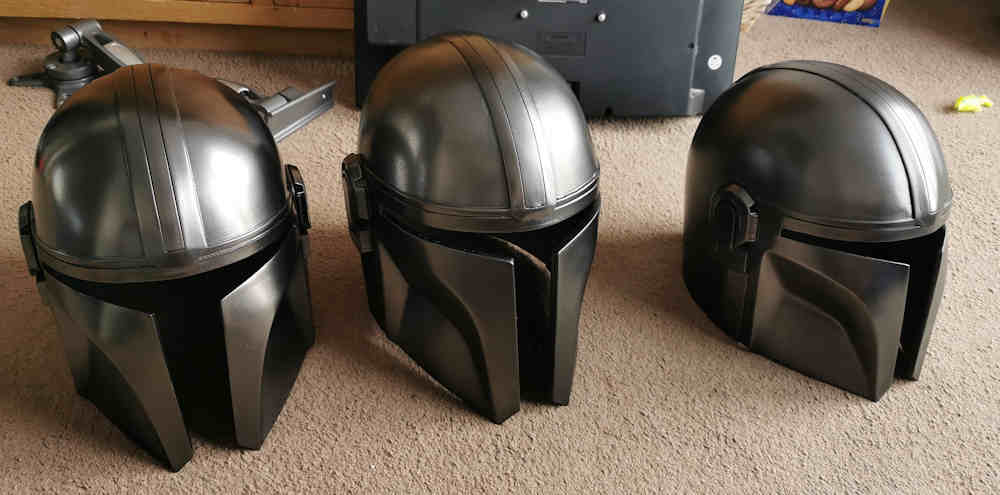
As mentioned previously, I printed some Mandalorian helmets. At the time of writing it has been six of them in total.
The reason for this number is that every one of the first five failed in some way and I had to work out how to print a separate continuation to complete the helmet. I became determined to get just one perfect, single session helmet print to break the jinx.
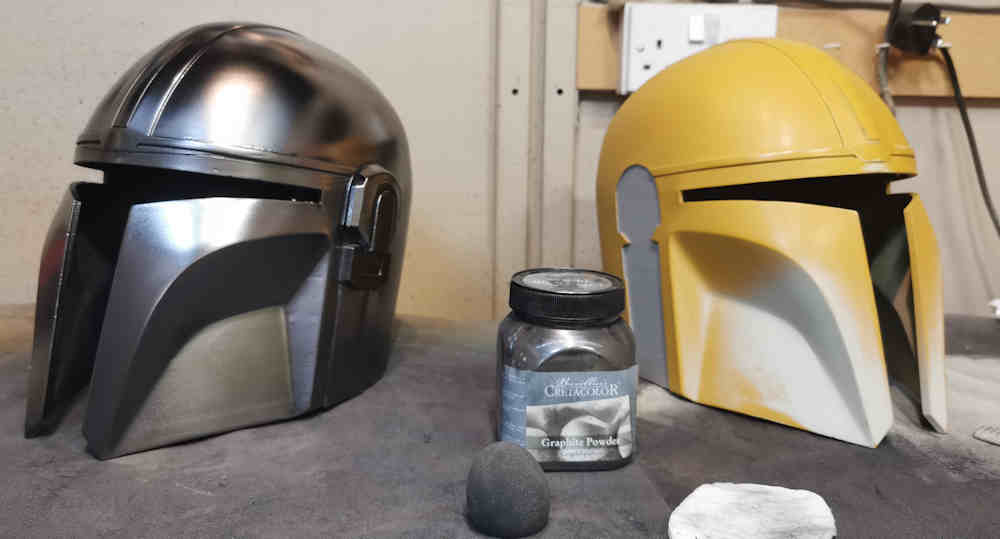
This left me with plenty of scope to practice filling, sanding and painting and I'm sharing my thoughts here because there were aspects of this that I couldn't find advice on and had to experiment on my own. This was mainly to do with graphite powder and shine. Anyone looking into how to get the best finish on their Mandalorian helmet will have seen videos of the miracle that is graphite powder. A jar of that stuff, a soft buffing pad and a bit of elbow grease produces something that wouldn't look out of place on a Cylon warrior.
Unfortunately I found that the camera lies and so, in the tradition of this website, I'll lay out the work I went through in the hope that it saves someone else some time and money. I'll very briefly outline my experience of preparing a finished PLA print for final painting and then go into the graphite powder thing in more depth.
I've maybe missed out a stage below, because I haven't mentioned the step where I'd fix the helmet like it was Ray Liotta's head after Hannibal Lecter has been at it. This involves strategically spot-glueing the very back with superglue while holding it flush until it's dry. Then I'd pull my stuck fingers off the helmet (making a mental note to sand off the flesh later) and line up and glue one side of the front. Once dry again, I'd glue the other side.
With the dome fixed in a good position, I'd run a line of superglue all around the seam on the inside of the helmet and then sprinkle bicarbonate of soda on the glue. I did this a couple of times before discovering the hard way that the reason it works so well is that the glue heats up to the point it melts the plastic and welds it together.
Who knew?
I found that out one time by trying to mix some wayward bicarb. into the glue with my finger.
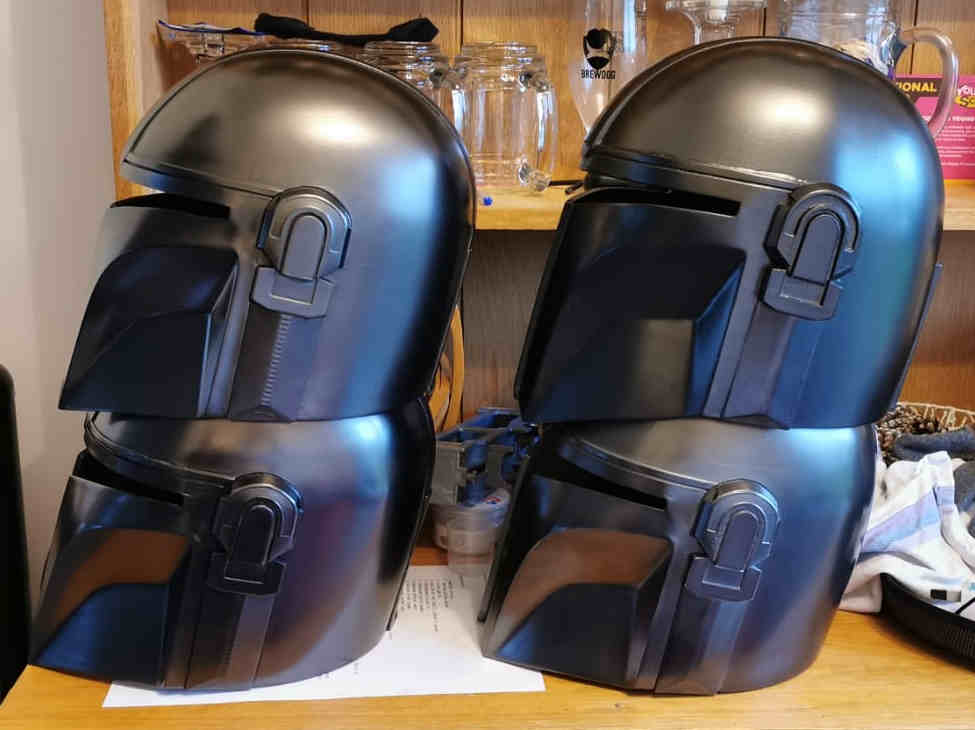
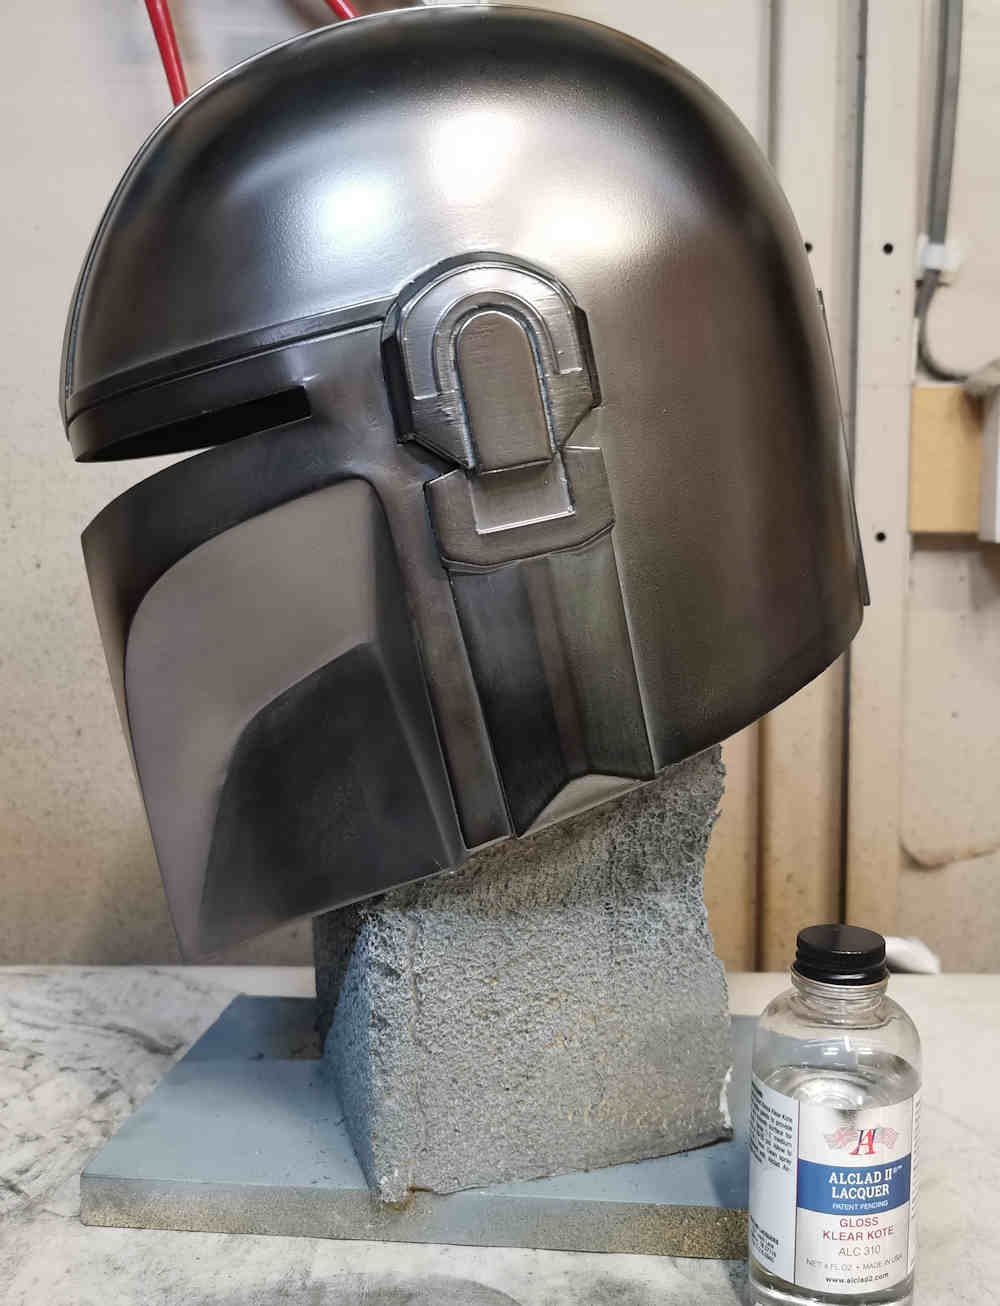
Ladies and Gentlemen, This is Mando Number Six.

 Stage 1 - Raised bits
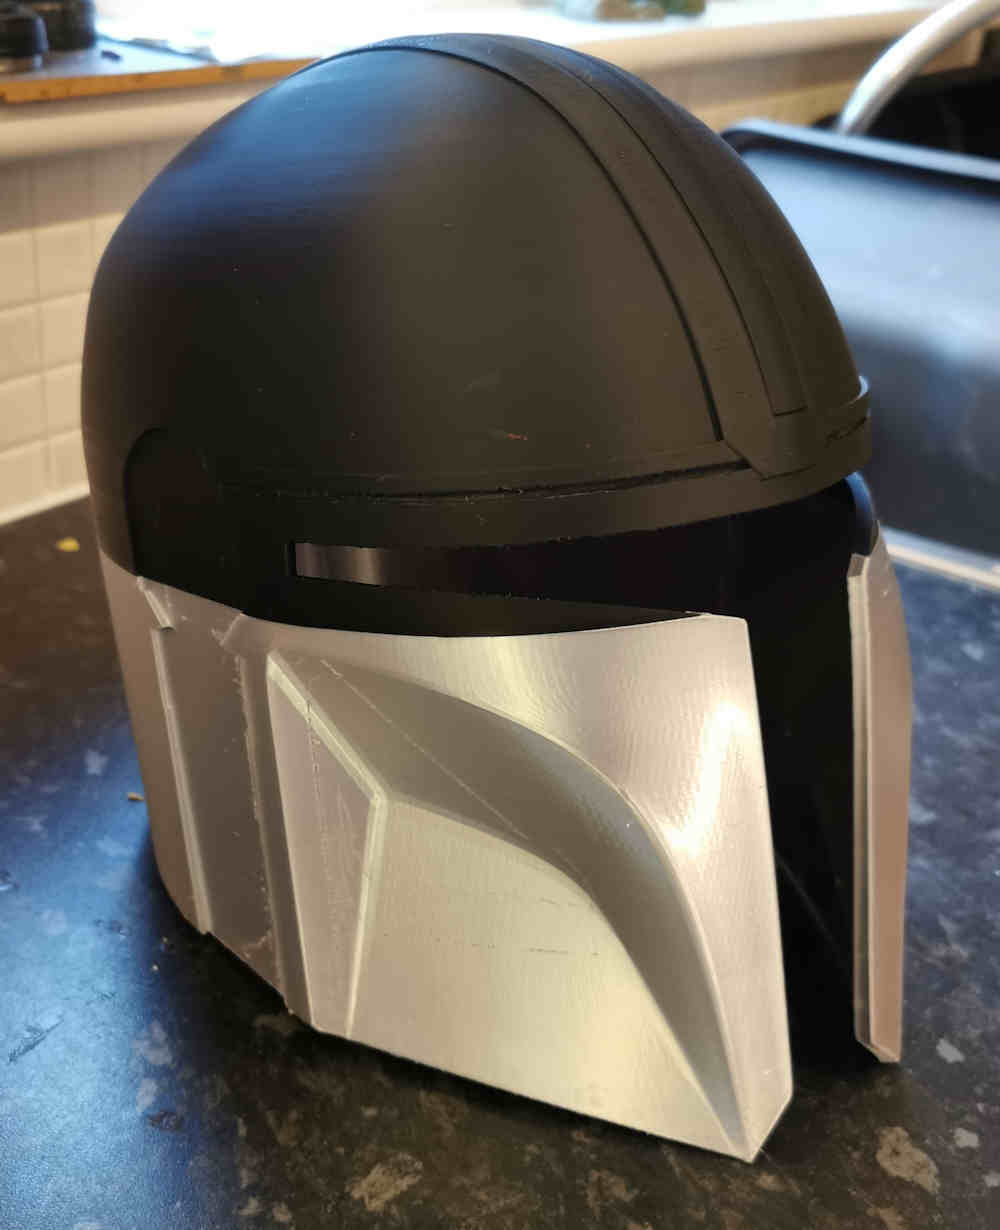
In my opinion, the first issue to tackle is anything that sticks up, i.e. blobs, zits and raised layers.
I used to take a craft knife to these and scrape along them like I was spreading butter in order to flatten them. This was because, when I first tried to sand 3D prints down, I ended up with granules of plastic appearing all over the place and the surface seemed to get more and more rough instead of smoother.
Later I found out I could sand these down if I wet sanded and went slowly. Now I go over the print with something like 120 grit wet and with slow, steady strokes.
Notice that in this print I tried masking the ears and backplate with frog tape in an effort to make it easier to treat every centimetre of the helmet. I now consider this a mistake because I had a hell of a job getting the bottom part of the ears to fit in after I'd used filler, plus there ended up being a big gap between the backplate and the helmet.
Worse still, when I was glueing the ears on and had to scrape some edges in order to get them to fit, I even managed to let the knife slip and put a scratch in my nice, smooth dome which then needed repaired.

Stage 2 - Pits
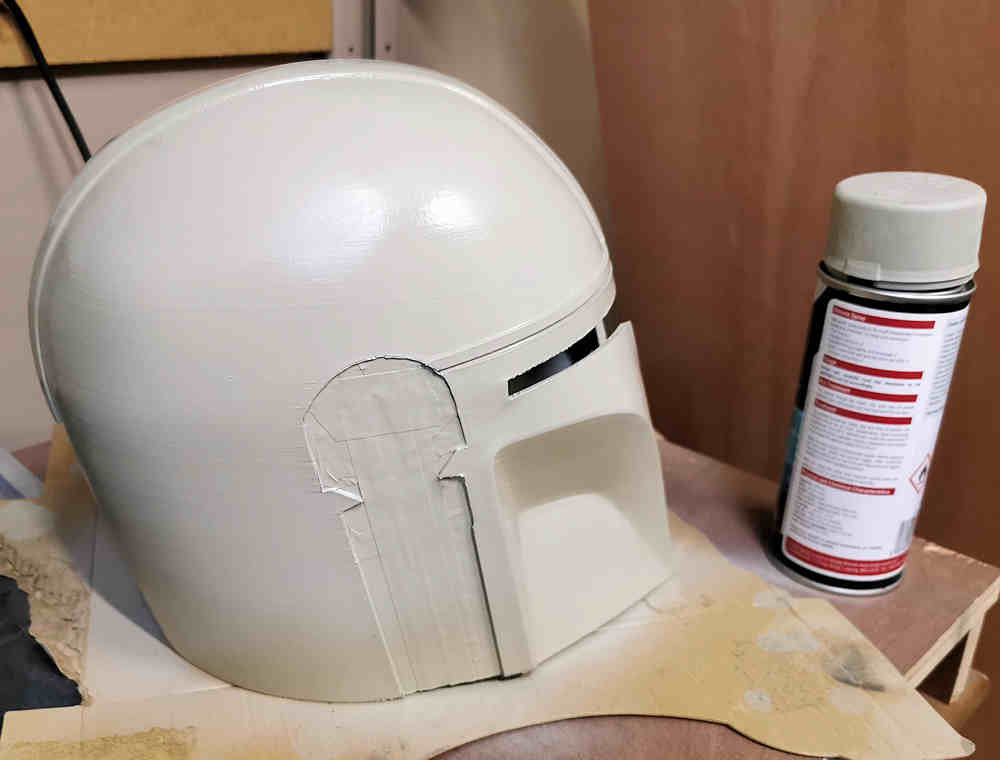
Next I fix deep pits with Perfect Plastic Putty and a wet finger and then go over the helmet with 4 or 5 layers of Motip Spray Putty before sanding it back down with 240 grit paper.
 This often uses a whole spray can and at this point, the layer lines and the inherent polygons of the printed curves have become flat and/or smooth.
After doing that, I'll use filler primer and then examine the helmet minutely for divots and remaining layer marks. I use Humbrol plastic filler for minor holes and scratches or else go back to Motip Spray Putty for anything larger scale.
I think in future I'd attach the backplate and lower ear parts before all this and spray them at the same time as the helmet proper, but maybe try treating the top ear parts separately and keeping them for attachment at the end.
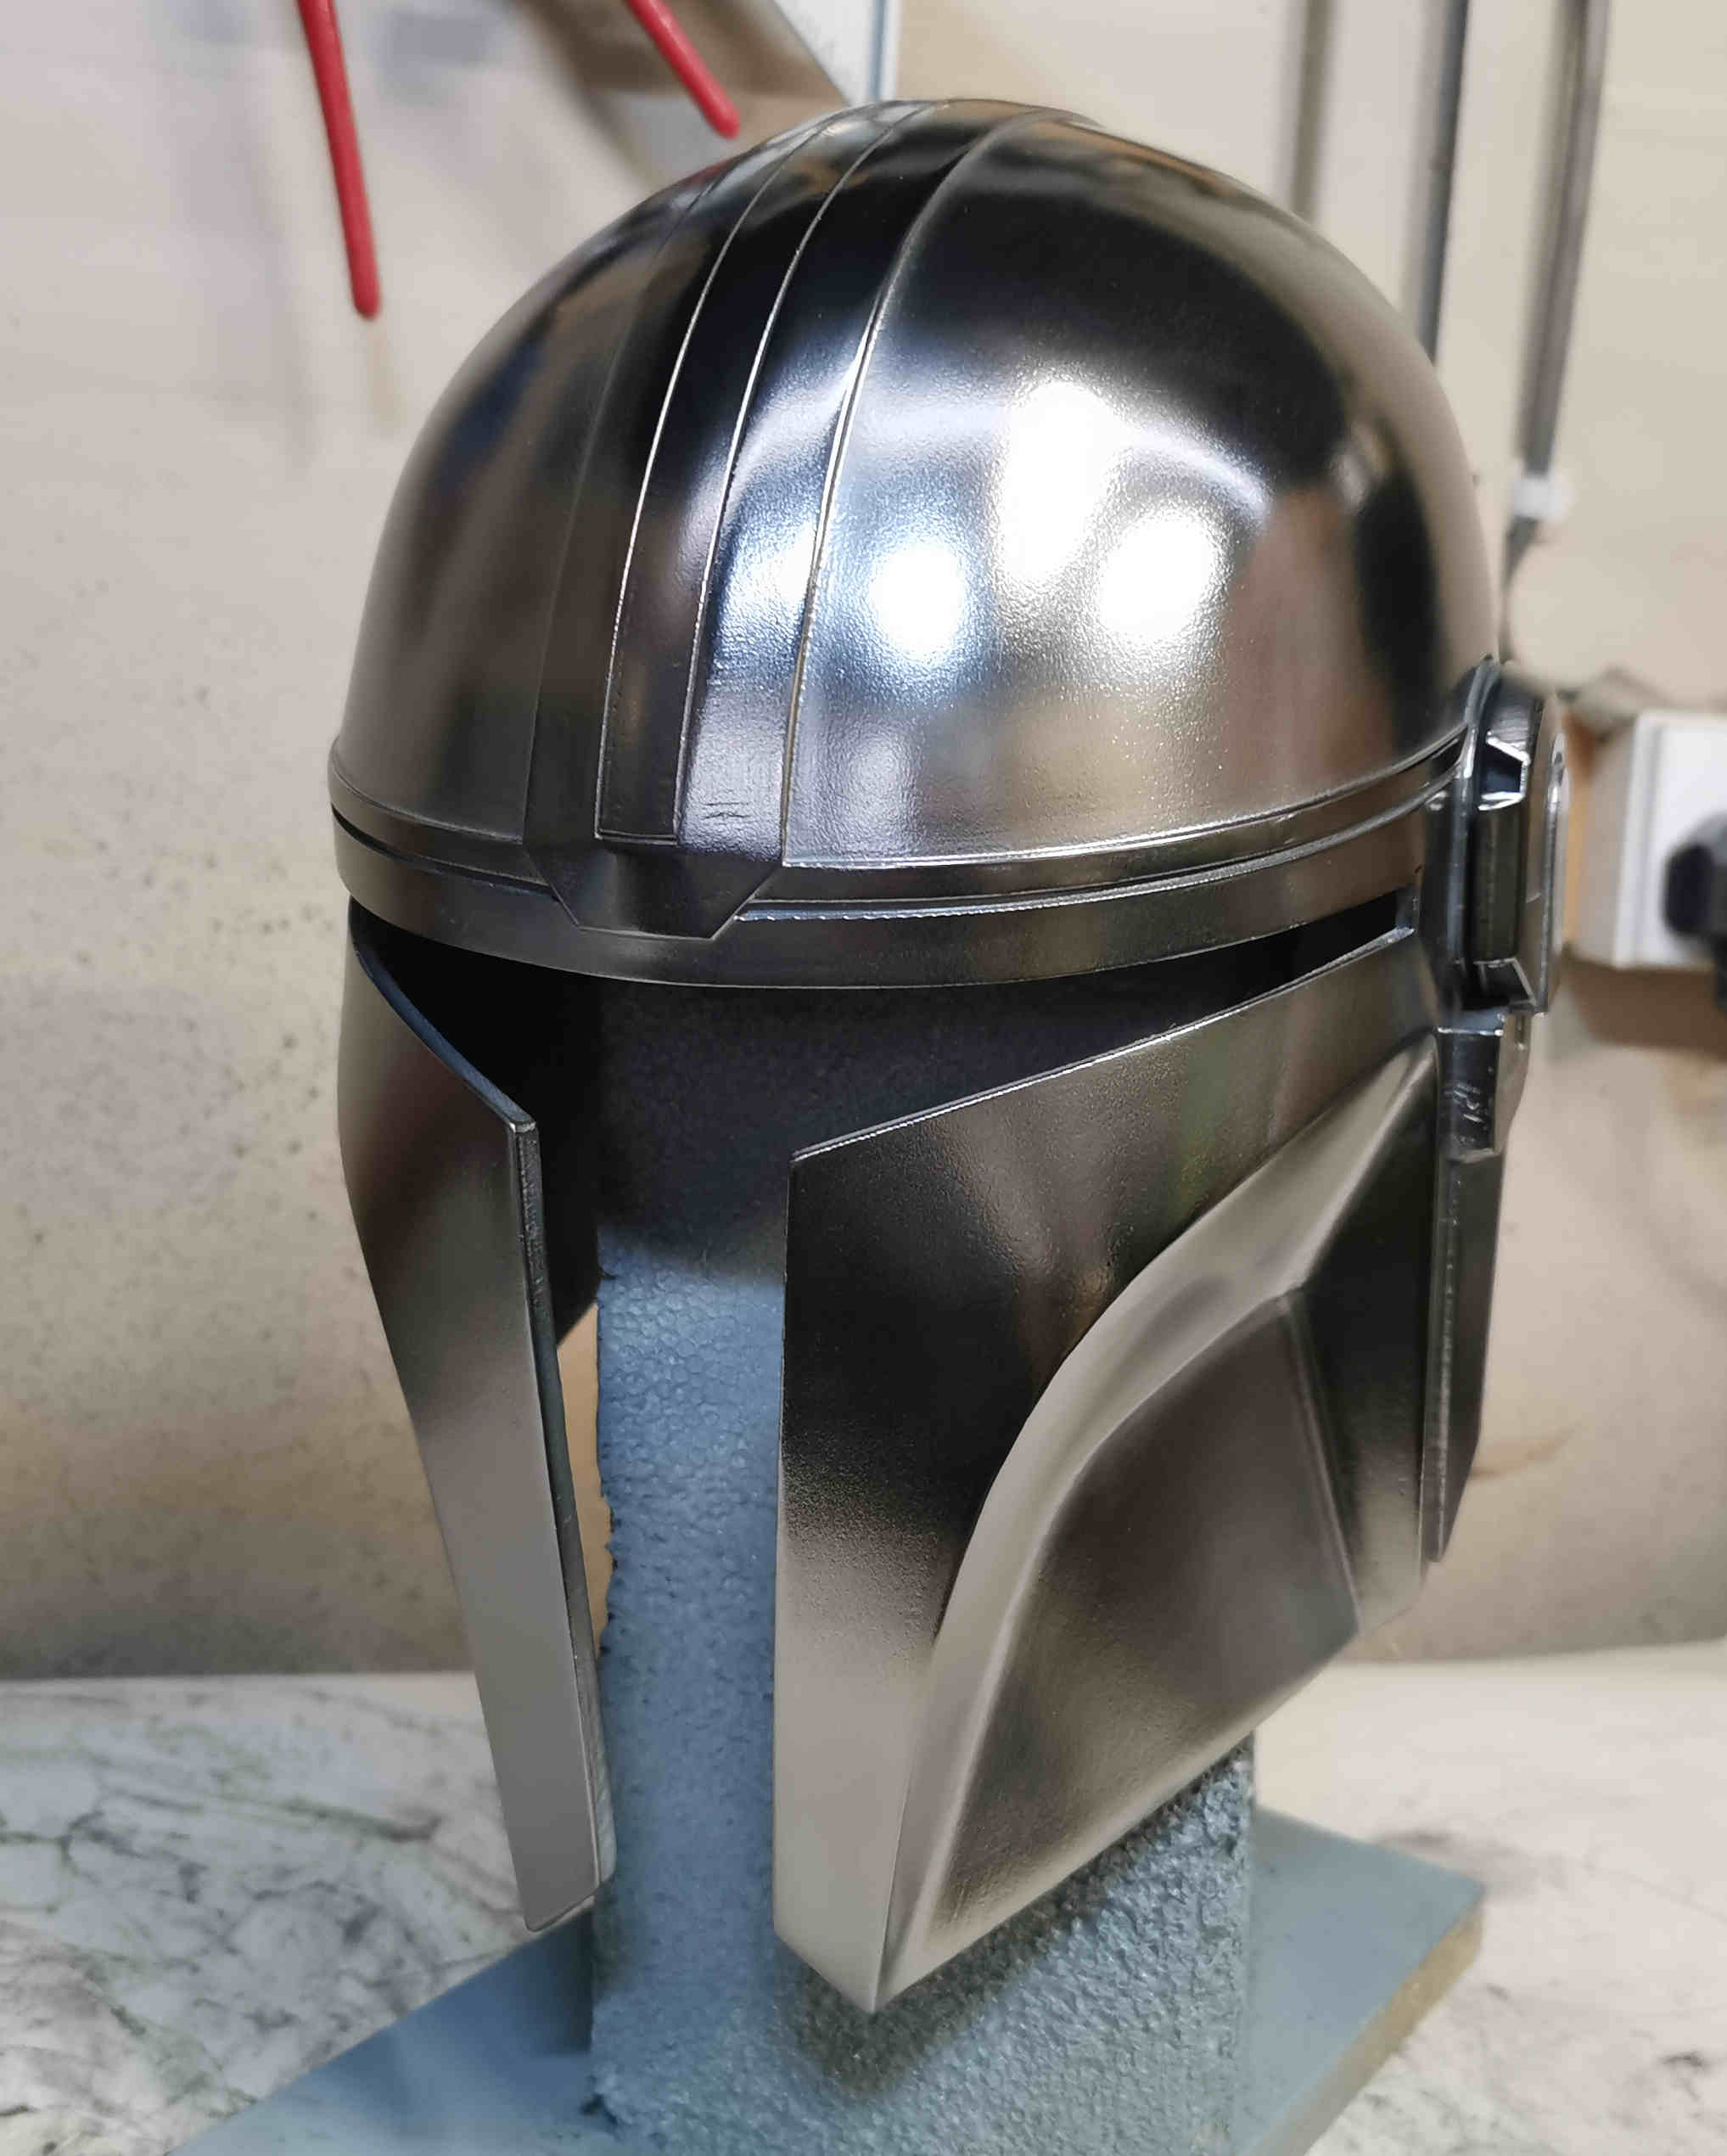
"The end" being right now, when I go over the whole helmet with 3,000 grit sandpaper to get a beautiful, smooth surface and then run a dentist-style pick tool round the crest of the helmet agan and again to gouge out the grooves.
You Can Look, but...
So...having glossed over the stages that turn a 3D PLA print into something as smooth as polished metal, I'll talk about graphite powder.
Like I said at the start, the camera lies when it comes to graphite rubs. The picture at the top of this article is a lie because the finished helmet doesn't look like that.
The same goes for these three experiments...
Pretty good eh?
The thing is, they don't look like that to the naked eye. It's like that famous internet picture of the dress when all us sensible, normal people could see quite clearly what colour it was, but some weird denizens of the World Wide Web were saying it was blue plaid with yellow polka dots and stuff.
|
|
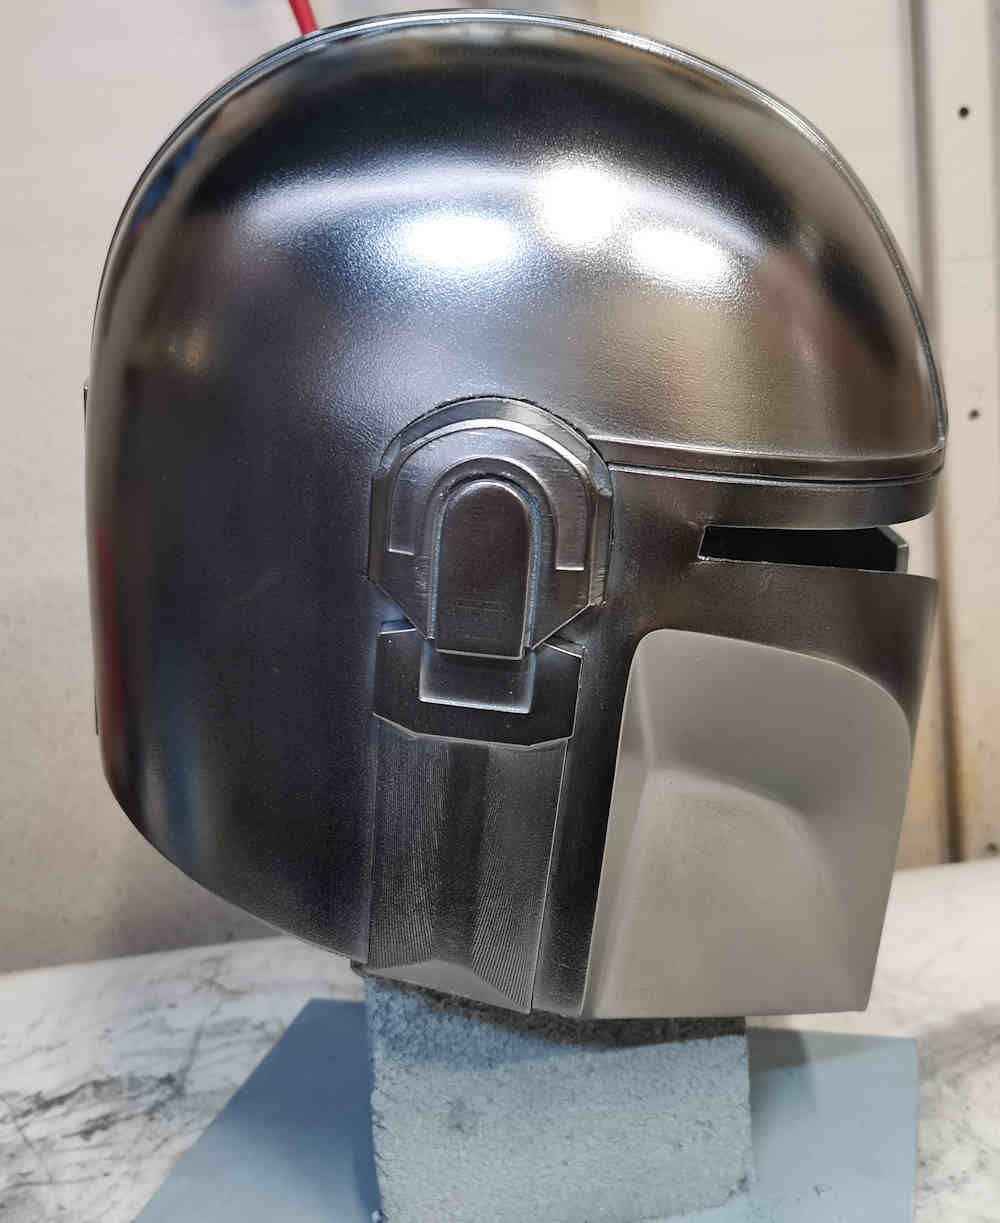
It was really quite difficult to get this photograph (left) showing more realistically what the helmets look like, which is a very black, gunmetal colour albeit with a nice, deep shine. This isn't what I was going for as it's too dark. I read onlline that the more you rub the helmet, the shinier it gets and the more graphite powder you apply, the lighter the tone. In truth, though, the surface only seems to accept a certain amount of graphite. With regard to the three experiments shown above, one has a single layer of graphite rub, one has had two graphite layers separated by a coating of gloss varnish and the one on the left has much more graphite on it, by dint of me repeatedly dipping into the powder long after it was clear it was not affecting the helmet at all. Not only are these too dark, but the shine is destroyed by the oils on your skin and they can only be touched with gloves. Any lacquer I tried to fix it with, just darkened it back to black. These four are all graphite powder on a gloss black base, as recommended in every video I watched,so I wondered what would happen if I used a lighter base, like grey and I started searching for more info on that.I found a video where someone had rubbed graphite on to gloss black, gloss white and matte grey. Why? Why do that? His conclusion was to say "I wonder what gloss grey would have been like?" Thanks bud. Frustrated, I bought some grey paint. |

|
I sprayed on some "Painter's Touch" paint, for no better reason than it saying "gloss" on the tin. The resulting graphite rub looked amazing. The picture on the right is not a lie for a change. It was visibly brighter in tone than on a black base. This picture (below) shows a bit of the base coat visible under the graphite, despite my best efforts with a cotton wool ball. I can only assume that your eye is more forgiving of a black background under chrome than grey. It looks like a sickly, blue colour. I wonder if I could do something similar with a gloss brown and get the "weathered" effect I see people trying to achieve? I personally don't want that effect, so I'm not going to bother exploring that avenue.
|
Unfortunately, sealing the graphite with Alclad Klear Kote left me with yet another helmet every bit as dark as the others. I might be doing something wrong here since airbrushing is even more new to me than 3D printing. I might be putting on too thick a coat? Or I might have bought the wrong lacquer product? Or maybe it's just that if you put a wet coat on graphite, it's going to soak it up and deteriorate every time? I'd welcome some feedback here. |
At this point I'm going to publish this article as it will be a long time unfinished if I wait until I've got round to all the tests I want to do. In the past week I swapped two of my helmets (poor examples that had never been sanded or filled) for rum and sold another on eBay. While that one was listed I was asked if I would do one for a small child and that is currently printing so I still have four to paint. The next article will be about my trials of "Spaz Stix" paint (Terrible name. I almost hope it doesn't work and I don't have to buy it again), Alclad Aqua Gloss, and an idea I have about putting graphite on top of another colour.