3D Printing 06 (Resin) - My First Dip
I've been a while writing this article because I wanted to be able to show a resolution to my problems. It's about what I've learned so far after buying an Elegoo Mars 3 resin printer and then trying to fit a magnetic build plate.
It seems I was completely wrong about what the Home and Set Z zero buttons do on my printer. I then had some major problems with warping and aquaplaning. Here are my adventures.
Soon after buying my first 3D printer, my eldest son bought a bundle of fantasy STLs from Humble Bundle to see if we could save money on his hobby of painting Warhammer miniatures. He doesn't get to play Warhammer much due to current world events and stuff, so he only paints them.
Except for terrain and scenery we didn't have much success. We ended up focusing on a Goblin model and had dozens of failed prints eventually leading to one that did finish, but when the supports came off so did his legs. Then the cleaver dropped off with his hand still holding it while we were looking at him. It's a mercy we put him in the bin without taking any photographs, to be honest. So, we gave up, sure that the models must be rubbish or else they wouldn't have been on Humble Bundle so cheap. Why was it so difficult to print one tiny model on a great printer like the Ender 5 Plus?
Getting my Tenlog TL-D3 Pro gave us renewed hope that soluble supports was the way to go and we made another, slightly less unsuccessful attempt.

We also printed a spider with no legs (it basically ended up like two eggs in a nest) and a wyvern with one and a half wings before abandoning the notion again.
Finding out that people print their miniatures on resin printers, we watched some videos and wondered if they could really be that much better. They must still have layer lines, right? All that skiddling about in vats of toxic chemicals and we'd still have to sand them, probably. If it wasn't for the fact I won a tidy sum in a local lottery I might not have bought one, but I did so I ordered an Elegoo Mars 3.
From the very first test chess piece we saw what resin printing was all about. The house is now full of D&D characters and half finished Loot Studios gothic structures. It has also been a godsend for the small parts of my Mandalorian prints - ears, bullets, knee greeblies etc.Anything I hated sanding.
Our first failed print taught us the importance of a long exposure time on the first layers, but then within a few prints I'd managed to put some heavy scratches on my build plate so I bought a scraper that holds plastic razor blades.
Then I went all in and bought a magnetic build plate. I couldn't get one my size so I went big, but cutting the soft part with a roller cutter and the plate with tin snips worked just fine.
So, back when the printer was first unboxed I'd gone though the instructions and levelled the Z axis with a piece of paper. I had subsequently noticed every time I did a resin change and tank clean that the paper was always jammed in there very tightly so I dutifully raised it 0.1mm and reset the 0 every single time. It must creep down slightly, I thought. I'll keep an eye on that.
After installing my newly trimmed magnetic plate I pressed home and heard a blood curdling grinding noise as the plate bottomed out against the 4k screen. Urgent note to self: do not home the Z axis with it attached. Meanwhile the Set 0 button was helpfully telling me it wasn't going to work until I followed the correct procedure of pressing home and then making adjustments.
No problem. All I have to do is remove the whole build plate, press home, raise the Z axis 10mm, set this new height to 0, raise it a bit, re-attach the build plate, press home again, lower it a bit, set THIS new height to 0 and bob's your uncle. It's so simple a child could do it.
I gave it a go and once again got the blood-curdling, nauseating grinding noise. Two further attempts with the same outcome convinced me that the set 0 button does nothing. Why is it there? Why do the instructions bother telling us to adjust the height and set the 0?
Now feeling clueless and desperate and having attached an extremely sticky thing to my build plate, I desperately examined it for some means of adjusting the length of the shaft. That's when it hit me that the build plate is attached by more than just an ankle joint. It's also spring loaded and can retreat into itself. The point of the piece of paper when levelling the plate is as an actual, physical spacer and not just to test for friction. Once again, what is the set 0 button even for?
Now, at this point I went a bit extreme and put 4 squares of paper under the build plated while I levelled it. The very next print failed in some areas (it was a build plate full of Mandalorian blaster parts and D&D figures) so I levelled it again with 2 sheets of paper and everything is good again.
My tip then, for levelling the build plate, installing a magnetic plate or anything of that nature is to LOOSEN THE BUILD PLATE, place two pieces of paper (or one folded piece), home the Z axis and then simply tighten everything up, forgetting that the set 0 button even exists. If the distance isn't correct, try 3 bits of paper, but to be honest my build plate has always been very tight to the screen and my printer is going great.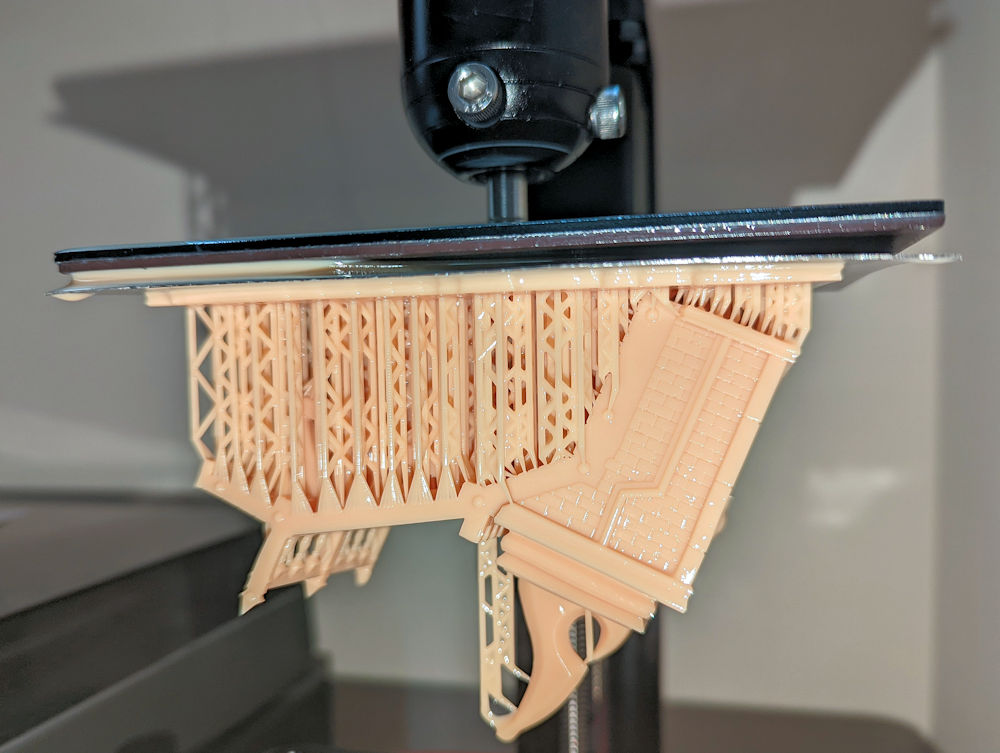
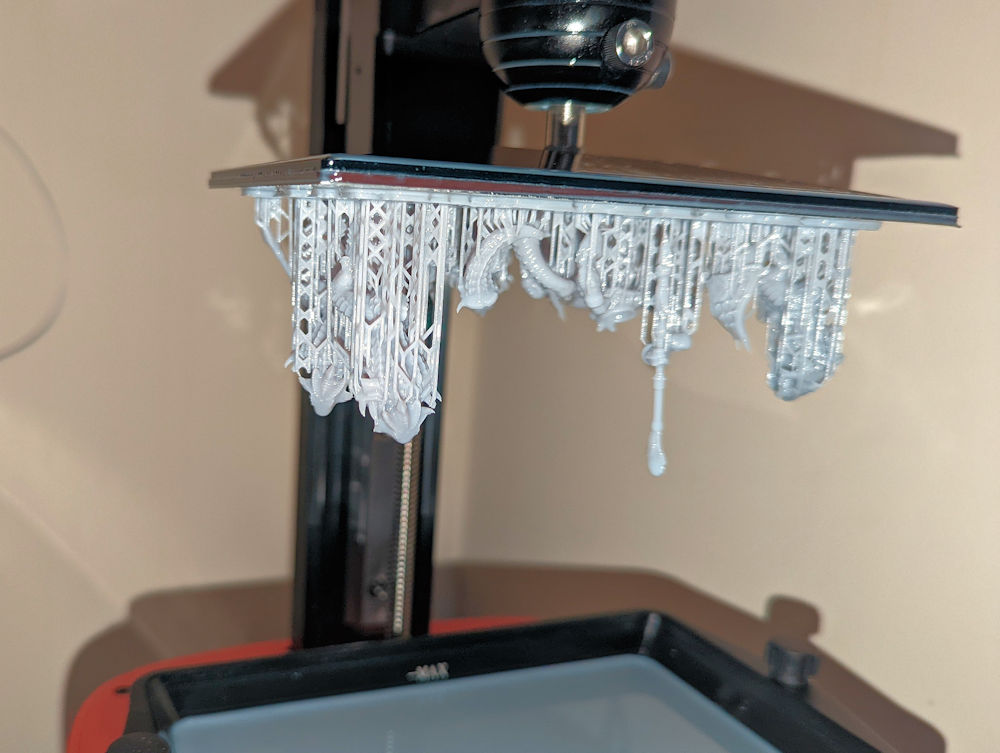
Cracking open a new bottle of resin, my son tried the magnetic bed and from the start we had a problem with the edges of the metal plate pulling away from the magnetic bed and letting resin under. It happened every time and in the worst cases the sheet would skate on the resin and cause a layer shift during the print.Best case scenario was that only the supports were squashed, warped and murder to remove and the print was usable. I looked into aquaplaning and tried sanding the magnet and metal sheet. We also lowered our lift speed and played around with exposure times all with no success.
At one point my FEP sprung a leak and left me with cured resin all over my screen. I was extremely relieved to find out there is a replaceable protector over it.

Unimpressed with magnetic beds, but having made an irreversible change to my buid plate, I ordered a replacement Elegoo Mars 3 plate from 3D Print Monkey. I tried six prints in succession with this new build plate and every one was a failure. The first few left thick slabs of cured resin floating about in my tank and only when I increased the initial exposure times to almost triple figures did I start to see finished prints - warped and useless though they were.
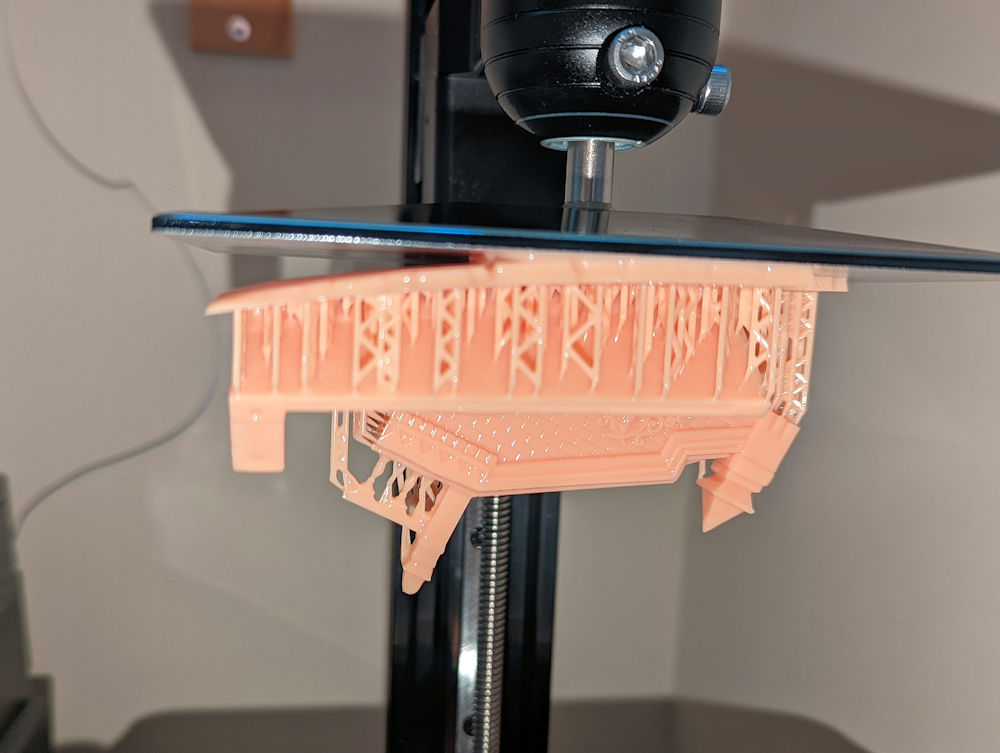
Looking at the two pictures of warped prints together, even I'm wondering how thick I was not to see the connection but at the time there were a lot of thoughts running through my head. First, I was raging that I'd destroyed a perfectly good print bed and left myself with a rubbish one by adding a magnet to the wrong one. Then I was absolutely livid at 3D Print Monkey's returns policy which seemed to me when I skimmed it to read as "if you have discovered an item is faulty, then you must have used it and we only accept returns if the item is unopened". I fired off an email, ready for an argument.
3D Print Monkey swiftly replied by patiently explaining that it was highly unlikely that a print bed would be so faulty as to not let prints stick to it. They suggested a few other reasons and offered help in getting it to work, but said I could return it if I really wanted. Basically, they completely disarmed me with one very reasonable email. The swines.
 |
I was about to fire off a reply saying the print bed was the only variable in my tests when I suddenly realised it wasn't. At the same time the magnetic bed arrived I had also taken delivery of 3kg of Anycubic Craftsman beige resin bought cheaply from Ali Express. So, I held off sending my reply until I ordered, received and used some grey Elegoo resin from Amazon. What a difference! The prints were perfect on the new bed. I then swapped the magnetic bed back in and it also produced a plate full of perfect (and easily removable) miniatures.. |
So, as far as I can tell I bought resin that, if left undiluted, superglues itself to the FEP and rips itself off the print bed. It's a happy ending though, because the magnetic plate is now everything I'd hoped for when I bought it. The good news doesn't stop there either since I also tried mixing some of the beige Craftsman resin in with the grey Elegoo and that produced perfect prints too, so I know I can use it up.
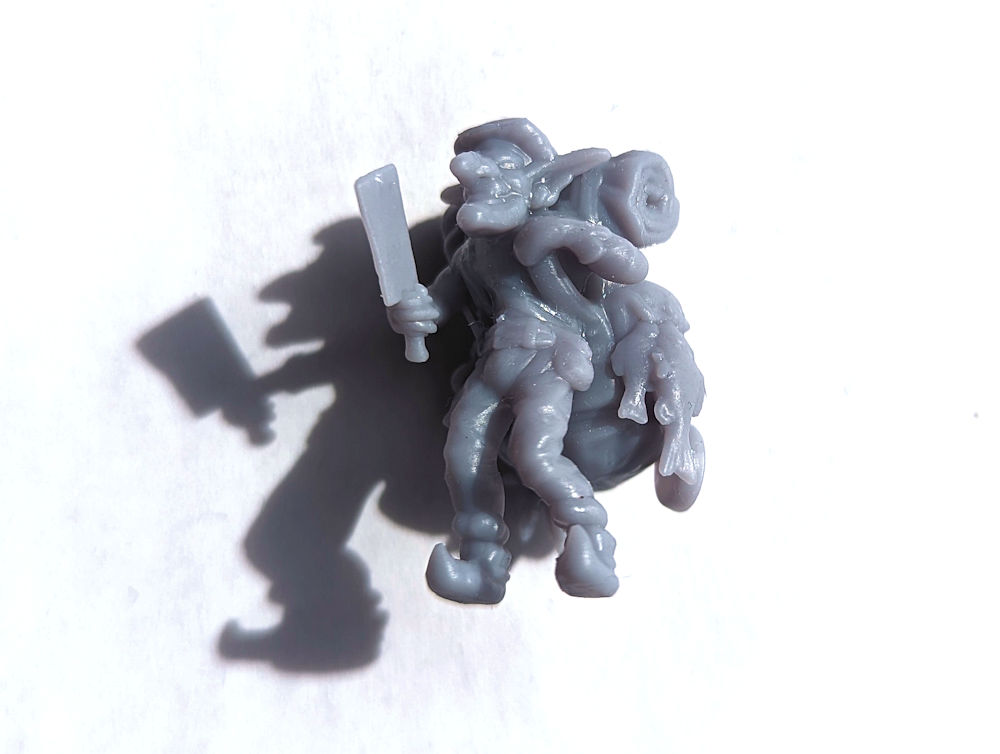
P.S. Here is the goblin printed in resin. I can see the fish hanging from his pack and everything.